This article was first written for Musicrun
magazine. It is reproduced here with their kind permission...
The aim of this article doesn't consist of parodying
the manual, which you have surely in your ownership, but to consider
the manipulations at use. So, let's imagine that we will record a drum
session from a VST Instrument, a bass from a synth or an expander and
a guitar in audio. And at least, we will definitively resolve this great
DAW mystery : for heaven's sake, how to transform a Midi track into Audio
? !
New Project and Settings
Thus, you have installed Cubase SX or SL,
the USB dongle is plugged in, your soundcard functions and all your connections
are done (Midi and Audio). Cubase SX being a professional quality-made
software (I can hear some grinding their teeth here, no ?), we will consider
that you are fitted out with a soundcard worthy of that name, that is
to say released with an ASIO 2.0 driver, without which there is no more
hope ! Take care to soundcards said to be multimedia, they give often
more problems than they should resolve ! Last thing : even if the
installation under Windows 98 is possible, Steinberg guarantees a good
working under XP or 2000 only.
|
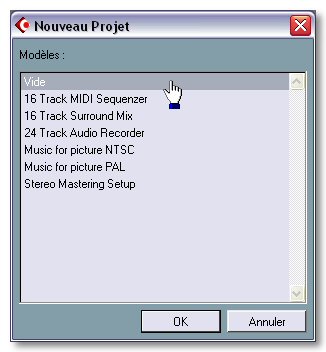
File / New Project. Cubase
is asking you which project template do you want to use.
For our example, let's choose the template Empty. Define the
folder which will receive the whole work files, you can create this
folder by clicking on Create.
|
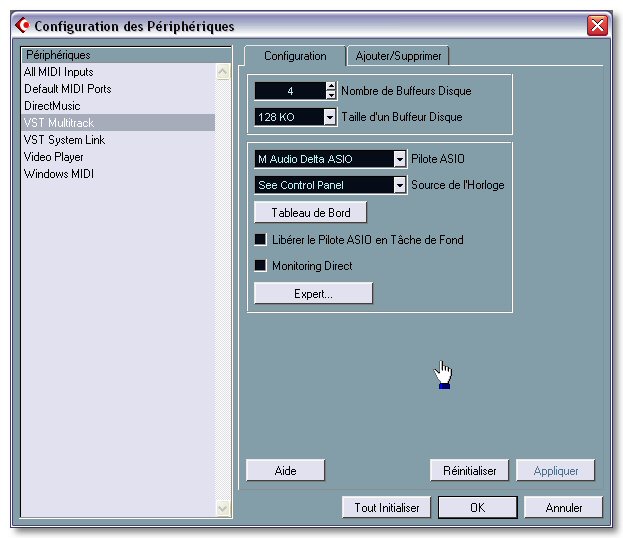
In the Devices menu,
take the option Device Setup. At the VST
Multitrack, Asio Driver section, choose carefully the
soundcard's ASIO 2 driver and not the DirectX or Multimedia driver.
You will untick off the Direct Monitoring box too.
|
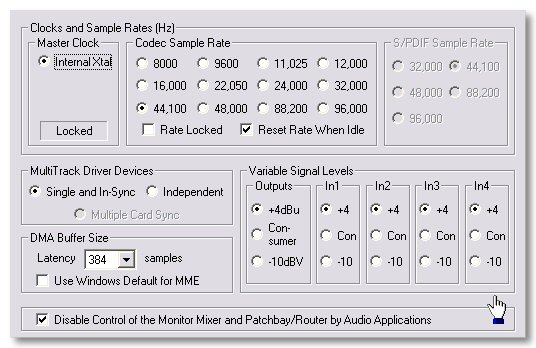
The Control Panel button
gives access to the control panel of the soundcard. You will choose
here a buffer size according to the latency you wish to have. No
miraculous solution, you must test several values in order to determinate
which latency can be supported by your machine.
|
 |
 |
 |
|
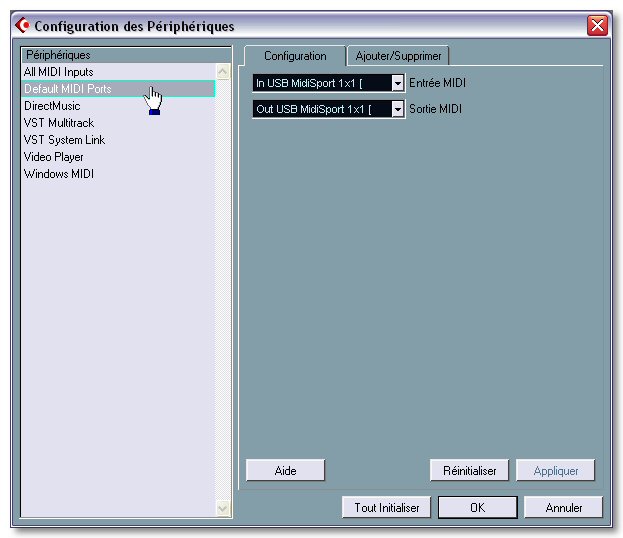
At the Default MIDI Ports
section, you will able to choose which Midi inputs/outputs are to
be assigned by default when creating a Midi track. And here, bug,
the output is not taken in account (Note : this is corrected in
Cubase SX 2) ! What a joker, this Charlie ! Click on Ok to
validate this all.
|
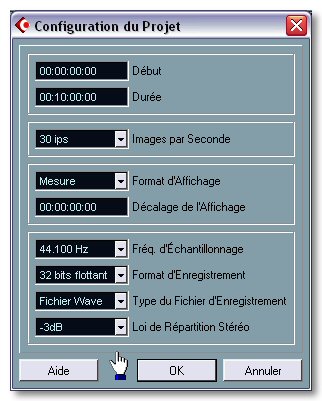
Then, Project menu, option
Project Setup. What will be here the most interesting
thing for us is, before all, the type of Audio files to be created.
We will opt for some files in 32 floating bits Wav format and
in 44.1 kHz or 48 kHz if you work with a Sound Blaster Live or Audigy.
|
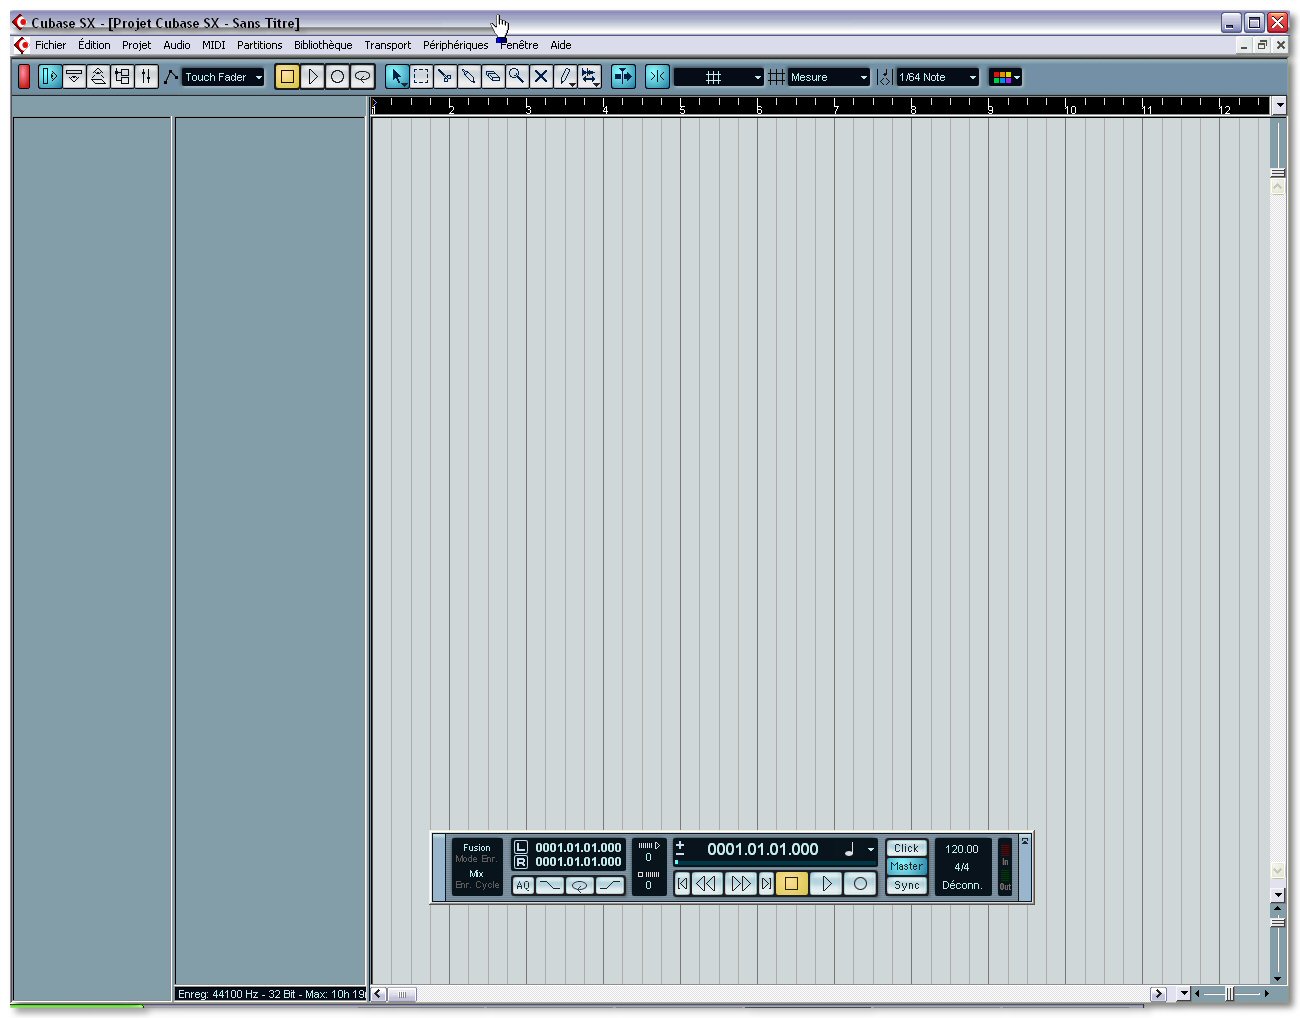
Now, here you are in front of your
project… which is empty ! If this is your first contact with the
software, I suggest to you to open all the menus and to do some
right-clicks everywhere. Even if the options don't mean anything
to you at this time, you will become familiar with your environment.
|
 |
 |
 |
Midi Recording
Cubase was first a Midi sequencer. It is
thus perfectly at ease with this technology. This article doesn't have
the claim to go for a tour about all the functions, of all the editors,
etc, but on the contrary to focus on the essential fonctionnalities which
allow to hit a mark as much essential : recording ! To use your synths
and expanders, you must have installed any Midi interface. The basic connection
is rather simple, link the interface IN to the OUT plug of your master
keyboard and the interface OUT to the keyboard IN. If you don't have any
Midi devices, the connection will be the keyboard THRU into the next device
IN, etc.
|
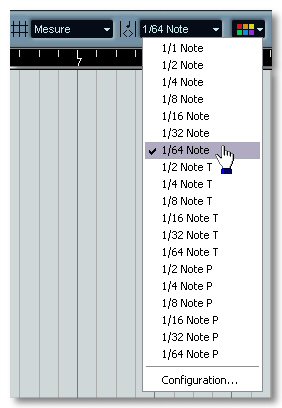
At the upright of the window, choose
a Quantize value. Take care, if this allow you to put some notes
at their right place, the Quantize can also give a mechanical and
inhuman aspect to your Midi recording. It's up to you to see. For
the example, we will choose 1/64.
|
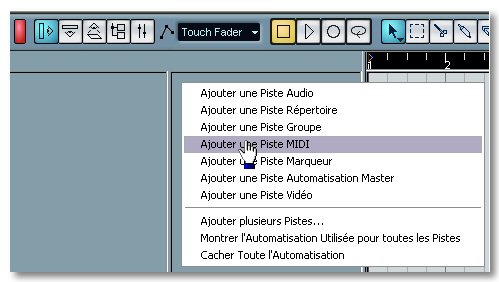
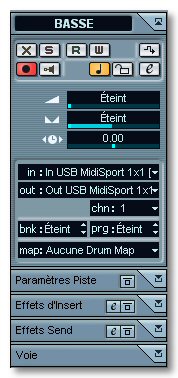
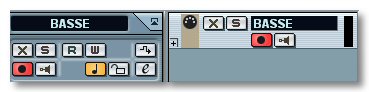
To add a new track, do a right-click
in the track column and Add a Midi Track. Double-click on
the track name and rename it into BASS. Do now an ALT + I
(an i like email !) to make appearing the Inspector if this
one was hidden.
|
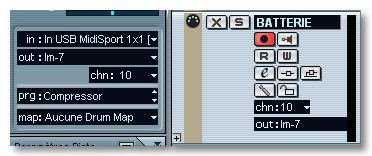
The aim of this article being not
to detail the whole Inspector, we will content ourselves on choosing
a Midi input, a Midi output (see the bug quoted previously) and
a Midi channel. The Midi channel must be the one your synth or your
expander is adjusted in reception for.
|
 |
 |
 |
|
On the Transport Bar, place the left
locator on the measure from which you want to start and the right
one far away at right ! Push down the C key to throw into gear
the Click and adjust the tempo. Verify that the red button Record
Enable of the track is well lighted.
|
On contrary with Cubase VST, the
track doesn't need to be selected to make the recording working,
the recording must just be activated on the track. Conclusion :
nothing keeps you from activating the recording on several tracks
simultaneously !
|
Hit the * key of your
numeric pad to start the recording, after two measures, it's up to
you ! Hit the 0 key of the numeric pad to stop the recording
and one more time to fail on the left locator. Hit
the Enter key and listen !
|
 |
 |
 |
|
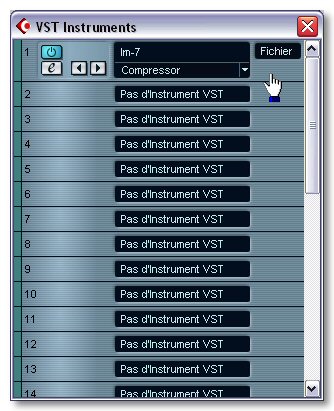
Same thing with a VST Instrument.
Do F11 to call the VSTi rack, click on No instrument
and select LM-7 which must be normally in the subfolder Drums. LM-7
is loaded with the Compression Kit by default, we will keep
this one.
|
Proceed then exactly as for the previous
Midi track but by choosing LM-7 as Midi output. If the latency is
too much high, you must reduce the buffer size in the control panel
of your soundcard, in order to obtain a latency lower than 10 ms.
|
When looking after the Recording Mode
(on the Transport Bar) being well adjusted on Fusion, nothing
prevents you from operating with several takes. Kick at the first time,
snare at the second one, etc. Method for those who, like me, use to
play with some mittens !
|
 |
 |
 |
Audio Recording
The method will look like to the one used for
the Midi tracks but it is important to understand that the recorded data
aren't made of the same nature at all. In Audio, your soundcard will capture
the signal that it receives, convert it into digital data which will be
written in a file on a hard disk drive. Lets' have a look now to the
guitar. Never mind the circumstances, whatever it is about a rack plugged
directely into the inputs of the soundcard or an amp captured with a mike,
plugged itself into a mixboard, the principle will be the same.
The sonorous source must just arrive into the Audio inputs of
soundcard.
|
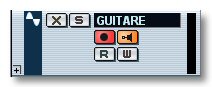
First, add an Audio track
in the same way that you inserted some Midi tracks. Rename it
into GUITAR. Activate the Monitoring by clicking on
the small HP button which is located near the Record button, and this in
in order to have a « feedback ». Then…
|
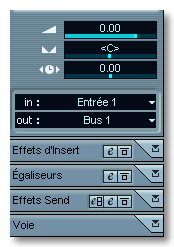
Cubase would have chosen the first
available Inputs/Outputs from your soundcard. If this one has at its disposal
some multiple I/O, you can choose those to be used for this
track. For the input, it is rather simple : you just need to use the one on which the Audio
signal arrives !
|
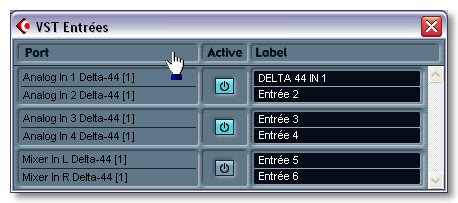
If all the inputs weren't ever available,
with the F5 key, open the VST input managers and activate
the one you think to need. If the Input names are obscure, you can
alwawys renamethem by clicking in the boxes of the
Label column.
|
 |
 |
 |
|
Open the VST monitor, twang
your favourite threadbare, the vu-meter of the bench-track GUITAR
should normally go mad itself. The volume Fader hasn't any action
on the incoming signal ! If the vu-meter clips, reduce the volume
from your guitar hardware or from your mixboard.
|
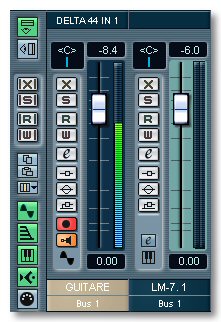
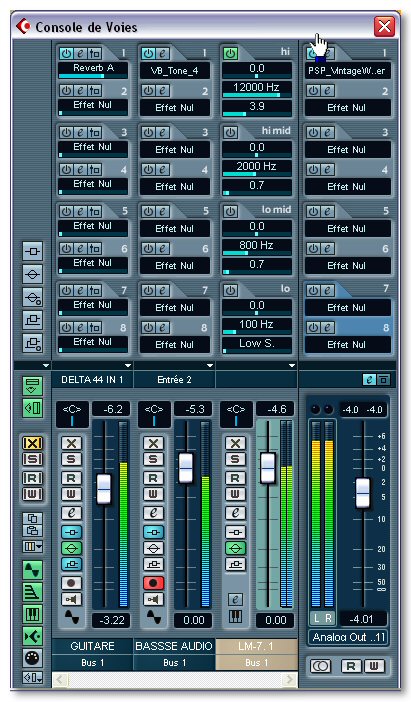
A littl' Reverb to make it beautiful
? With F6, open the effects rack and load Reverb A. Choose the preset
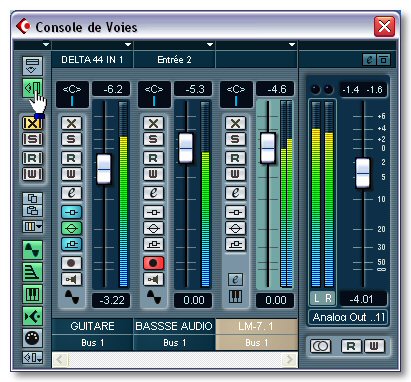
which will best fit to you in the pop-up menu. Back to the mixboard,
click on what we will consider to be an « e », just below
what is indubitablement a « W ».
|
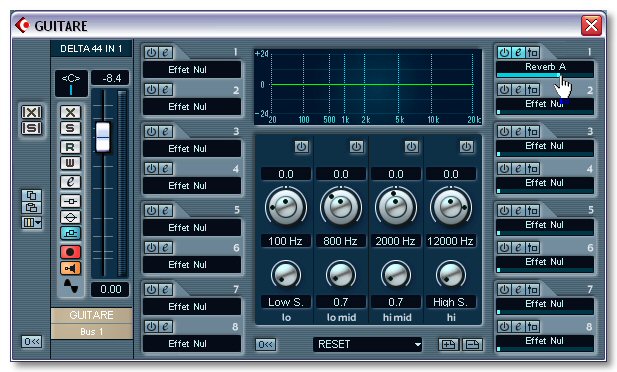
This button opens the Channel
Settings. Here, you have access to all the available parameters
for a track. To activate the effect on this track, simply click
on the left button which looks like nothing ! Measure out the effect
with the « tirette ».
|
 |
 |
 |
|
If your guitar sound heavily «
enter » in this temporary mix, you can here correct its result
in frequency thanks to the Equalization part. The adjustments can
be done with the buttons as well as directly by manipulating the
curves in the interface.
|
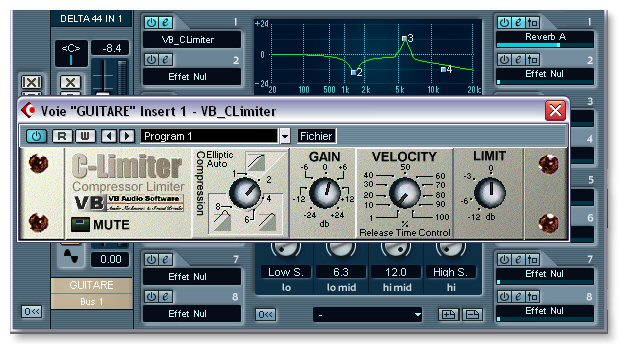
Certain effects are used rather in
Insert (only the processed sound will be hearable). On the left
side, you will have at disposal 8 Inserts in which you can load
some Plug-ins. In Insert, you will rather apply some dynamic effects
like compression, equalization etc., for example.
|
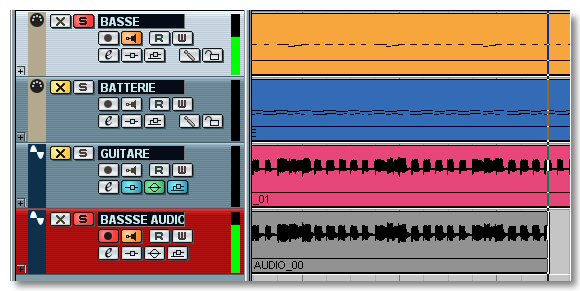
To record, practice exactly the same
way as for the Midi tracks. Well, here you are, you have now 3 superb
tracks, a Midi one, a VSTi one and an Audioone . You will just have
to do the final mix but I promised to reveal to you a great mystery
: converting from Midi to Audio…
|
 |
 |
 |
Converting from Midi to Audio
If I should have won 10 €uro each time this
question was asked, I could offer to myself a series L ! So, we will do
it simple, take a paper and a pen and copy 100 times « Midi is not sound,
Midi is not sound » ! Ah yes, Midi is not Audio. A Midi track contains
only a series of instructions of which the receiver device will merely execute.
Example of instruction : fit yourself on the program #16, play the note 38
with a velocity of 121, stop playing the previous note… As a consequence,
if you ask to Cubase to make an Export Audio of your Project, the
bass track won't be taken in account. That's the reason why you must convert
it into Audio.
|
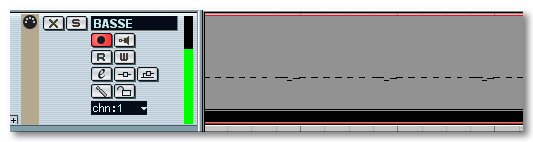
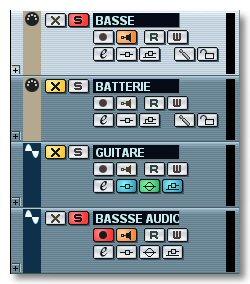
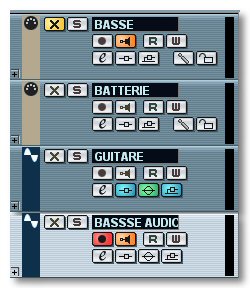
Add an Audio track named BASS
AUDIO. Activate the recording and the monitoring. Select the
Midi track BASSi and click on the S or push down the
S key of your keyboard. Your track is now in Solo, it will be the
only one being hearable during the playback.
|
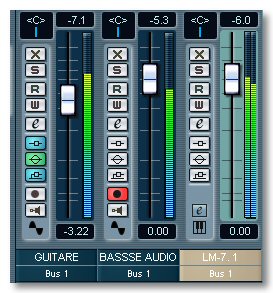
Start the playback of your song,
open the mixboard and look what happens. On the first hand, Cubase
reads the Midi track BASS which is in solo. On the second
hand, as the track BASS AUDIO is in recording and that your
synth sound is reaching it, the vu-meter is displaying som'thing !
|
Adjust the locators at the beginning
and at the end of the Container. To work faster, select the
Container and hit the P key of your keyboard. Adjust the
synth volume so that it doesn't clip in input. And finally, start
the recording and let Cubase do its job.
|
 |
 |
 |
|
Stop the recording at the desired
moment, click on the S of the Midi track BASS and
then on the X of the same track. You don't need it anymore,
this will mute it. Our business is beginning to look fine, isn't it ?
Beg your pardon ? The drum track ? Read the continuation !
|
I've got a good news for you : Cubase
considers a VST Instrument track as to be similar to an Audio track. That
is to say that during te final mix, the drum track of our Project
will be processed and taken in account like any Audio track, effects
included !
|
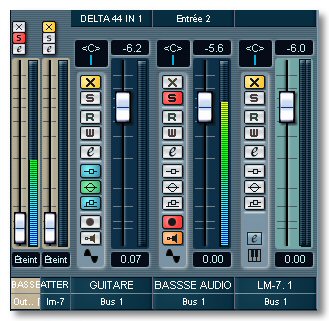
When talking about final mix… From
the mixboard, adjust the level of each instrument. Click on the
Display Output Channels button which will make the Master channel appearing then at the right
of the mixboard. Adjust it so that the output is closed to 0 dB,
but never above.
|
 |
 |
 |
|
You can of course work your mix by
adding some effects on your Audio and VST Instruments tracks, and
by using some equalizations. Don't worry if the
first results aren't similar to your favourite CDs, mixing is a
job, this implies work and persistence… To end…
|
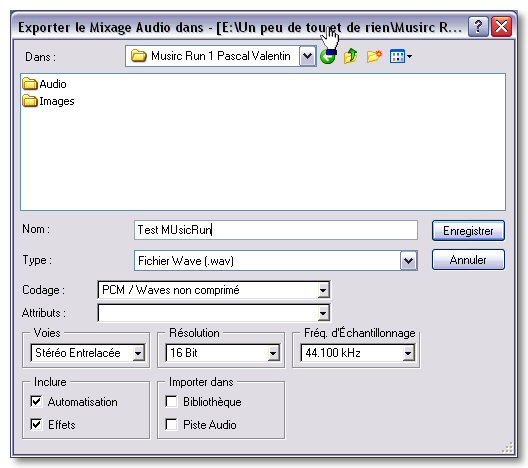
Adjust the locators so that they
screen your whole song. File menu, select Export / Audio Mixdown.
Name the file. If you want to burn your work, choose Wave, PCM,
Interleaved Stereo, 16 Bit, 44.1 KHz. Tick off Automation and Effects.
Click on Record.
|
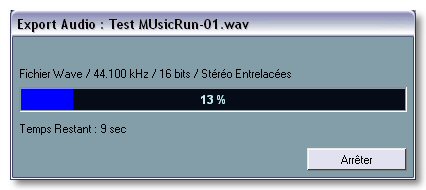
Finished ! You obtained a single
Audio file which is the reflection of your mix. This is only
a first approach, we should talk also about the Insert effects, the
Eq, the automation, the mastering, the dithering, etc. Next time
? Conclusion : see ya soon, here or somewhere else ,o)
|
 |
 |
 |