


Cubase SX step by step - The Automation

This article was first written for Musicrun magazine. It is published here with their kind authorization...
The Automations
This month, I propose you a big part which will change your life if you don't know anything about it. Professional sequencers air a pretence : to be able to replace all the hardware elements present in a real recording studio. We wouldn't have forgiven them if an Automation system was not integrated. You can notice how things are well done : Automation is precisely one of the points on which Steinberg fully reviewed their work between VST and SX !
Fulliautomatix !
First of all, let's answer to this question : Automation, whuzthat ? Automation, present on every mixboards we can find in pro recording studios, is a system which will memorize and « playback » the whole variations applied to the different parameters of the mixboard, fader, Eq, effect level, etc. Now, computer science goes further. As all the virtual studio elements (the sequencer itself but also the effects and the virtual instruments) are managed by the sequencer, they will be all « automatizable » ! In short : added to the variations applied to the mixboard, you will be able to manage the parameter changes of your dear plug-ins too !
Cubase SX makes the distinction between 3 types of automation, the
Audio tracks one, the VSTis and Plugins one, and the Master effects one
(read Musicrun 2). Mainly, their handling and their management
will be the same but their utility will differ. Let's begin with
the basic principles... |
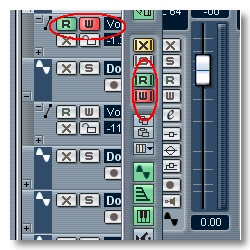
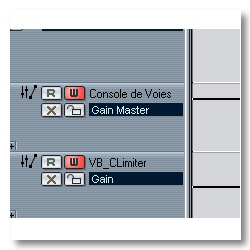
The 1st method for writing an automation is the
« I'm very lazy » method ! Did you notice the « R » and « W » buttons disseminated a little bit everywhere in the software interface
? R for Read, W for Write. Let's go for
a little practice exercise. |
On an Audio track, click on the
button « W » so that it becomes red. Start the playback and, for
example, modify the volume during the reading of the song.
Stop the playback, go back to the starting of the track, deactivate the « W » and click on the « R » (it becomes green). Play, so ? Hum |
 |
 |
 |
If you did it well, the volume fader will reproduce the
movements you applied to it during the previous stage.
Important thing, an Automation « subtrack » has been created below the
Audio track itself but it is hidden for the moment ! In order to
display the automations... |
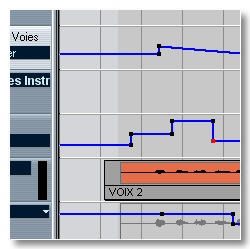
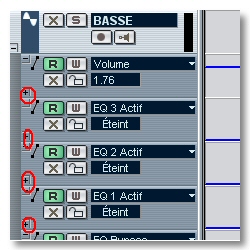
For each track, in the track column,
you can see a small « + » downleft. By clicking
on it, you make appeare the Automation track which is related to it.
Each new click on a « + » adds an Automation subtrack
with another parameter. There are 48 parameters. |
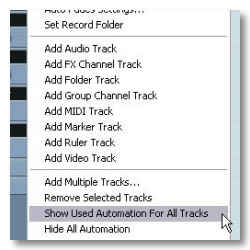
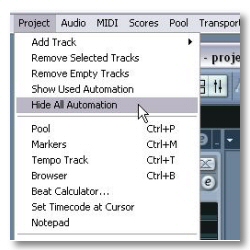
The contextual menu
allows to quickly hide or display the
Automations. Notice that those options are also available in
the « Project » menu. This was a first approach which make it already possible
to do many things. Let's jump now to the following stage :
the Pencil tool ! |
 |
 |
 |
To your pencils
The automation being explained like that would be even so a little bit rustic if there weren't some powerful possibilities of writing and editing those Automations. Those vital functions for such a sequencer are as simple to use in SX as they were puzzling in VST ! The « ancients » will understand me ! In SX, each point can be edited with the mouse, you can draw them with the pencil with some preset « shapes », handle them per group, etc. And of course, in case of error, a good old CTRL-Z will allow you to go back thanks to the unlimited Undo, another major improvement of SX. SX 2 promises us besides to go further, watch the test in a coming chapter !
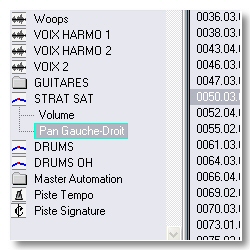
Practice exercises. Choose an Audio track. Click on the « + » to display the automation subtrack. By default, the volume parameter
is proposed. The pop-up menu makes it possible to choose
another parameter among the 48 quoted previously. Click on « Sum » to have access. |
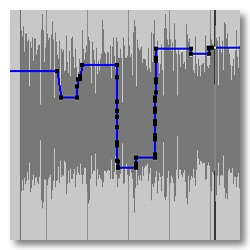
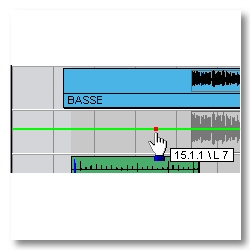
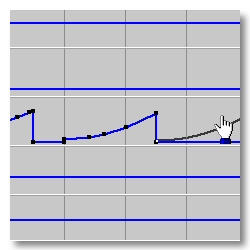
Let's take « Panner - Pan Left-Right ». The green line
represents the Automation itself. For the moment, it is
a straight line and steady on the actual value of the Pan in the Mixboard.
Clicking on the line with the « Select » tool adds an Automation point
which can then easily be handled. |
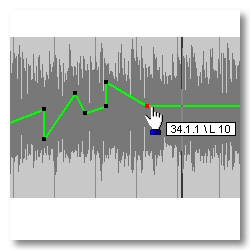
The aim of the game is to create
as many points as needed and to arrange them so that you can obtain
the expected variations. The job is made easy by the fact that a
tooltip indicates the position and the point value.
I will now give to you some additional tricks. |
 |
 |
 |
With the « Select »tool, you can circle several
points and then handle them at the same time. If a point is already
at its maximum or minimum value, unselect it by clicking on it
with the Shift key holt down. To erase one, select it
and... Delete ! |
The « Pencil » tool is much more interesting
because it makes it possible to draw some complex
Automations on the fly and fastly. Simple use :
select « Pencil » in the contextual menu and draw your
curve directly on the Automation track. It's easy ! |
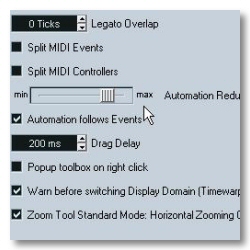
You will then
notice that SX deletes the unnecessary points (those which
are located in the alignment of 2 extreme points). The sensibility
of this correction can be adjusted in the preferences (File menu)
at the Editing / Automation Reduction Level section...
Next ! |
 |
 |
 |
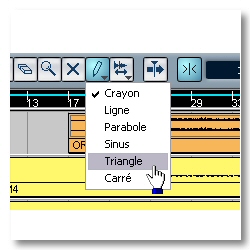
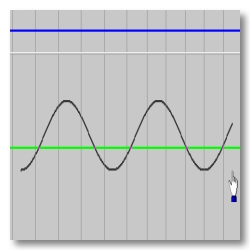
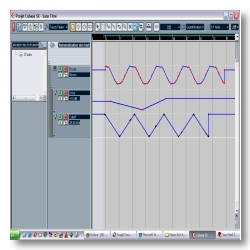
Look at the Pencil icon in the Tool Bar. The small arrow
indicates that the tool proposes some other options. The Pencil sets at
your disposal some preset shapes Line, Parabola, Sinus,
Triangle and Square. They can be used as the pencil except that...
They can be quantized ! |
To do this, before drawing a curve,
you just need to activate the Snap (>|< icon), to choose « Grid » just on the right, then Quantize again on the right. To
end, select a Quantize resolution, your curves
will be now faithful to your adjustments. Not bad, no ? |
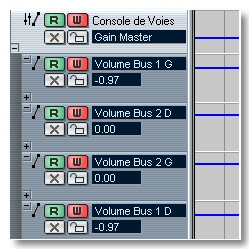
Just a word
about the Master Automation. You must insert a dedicated track but
the reminder of the working is similar. You can act on the main volume,
on the busses volume (depending of those proposed by the
soundcard) and on the input level of the 8 Master Plug-ins. |
 |
 |
 |
Plug-ins Automation
We intended for the moment the mixboard Automation only. Let's see now what happens with the Plug-ins, either they are effects or virtual instruments. First of all, we must accept an evidence : all the Plug-ins are not on equal terms in front of the Automation. Cubase's one concerns Steinberg's responsability. Each Plug-in's one depends of the will of its creator ! A parameter would be automatizable if the programer has foreseen this ! What will follow depends thus on the program which is used. You would have understood that, here, we will use automation to act on all the Plugin parameters and to make them varying in time. Action !
Well, first thing, in order to display the Automation track of an effect
or a VSTi, you must click on the « W » of its interface. A bit hard to find...
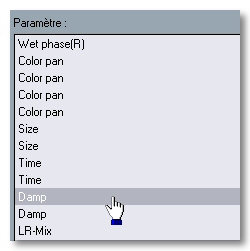
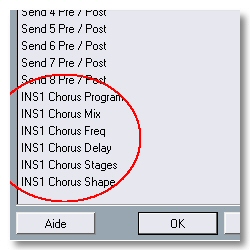
As for Audio tracks, the pop-up presents you
the parameters that the programer was kind to set at
your disposal. |
Of course, you can generate some variations, either by
moving the buttons while the button « W » of the plugin is active or by
using the Pencil and Select tool, as seen previously. Another
common point, by clicking on the small +, it is possible to
show as many parameters as wanted. |
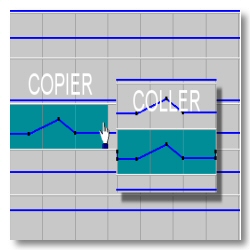
Hey, it's a trick which doesn't appear
in the manual, besides! How to copy-paste an
automation? With the « Range » tool, select
the part to be copied and do CTRL-C. Select then the
destination and do CTRL-V. You just need to learn to aim accurately ;o) |
 |
 |
 |
And now, as it is my kindness day, another one ! We saw that
we can now quantize some preset curves of the pencil. But, by
holding down the Shift key before starting to draw,
you will be then fully free to determinate yourself
the periods length. |
Raaah, they want some more ! Ok ! If
editing with the mouse rebuffs you, you will be amazed to learn that the
Automation Events can be edited in the Explorer (CTRL-B). Things being well done, the Explorer directly wedges
on the selected Event. |
The Inserts ? They
add their own parameters to the Audio tracks' ones. On second thoughts,
that seems to be logical ! Notice also that the Midi tracks can be driven too, volume, pan, mute, transpose,
velocity, etc. On another hand, the Midi plug-ins are not taken into account. |
 |
 |
 |
Concerning the VST Instruments, their Automation differs
because of the high number of parameters which can bring into play in comparison
with an effect. I counted 147 parameters for LM4 MKII and 66 for
Xphraze ! To you the happiness of the filter variations and other
resonance to your synths ! |
About the Master, effects, their Automation
is grouped with the Master's one quoted above. Here again, the
possibilities will depend of the will that had the programer
of inserting the automation or not. This could be even so a decisive criterion
when choosing a plug-in... |
Here we are about this short review of the Automation ! Just for this reason, the upgrade from VST to SX meets the
case. Watch the imminent arrival of SX 2.0 (official release on
09.04.2003) because it promises to go further into the step according to
the first information. See ya soon, here or somewhere else ,o) |
 |
 |
 |