


Cubase SX step by step - Generic Remote

This article was first written forMusicrun magazine. It is published here with their kind authorization...
The Generic Remote
Considering that many people don't have the circumstances to buy a control surface, we will see how to use your Midi keyboard to drive Cubase SX. You need a version 1.x from SX, or the version 2.2 from the 2.x series, Steinberg having the unfortunate initiative to put out the Generic Remote from the primary versions of SX 2, ouh bad boys !
To drive all, play the Remote doll !
So, what do we need to achieve our project ? Well, on one hand a Midi keyboard is needed. The more buttons, wheels and faders sending Midi data it will have, the more possibilities you will have. Then, any well-setted Midi interface which is recognized by Cubase is needed. From there, the principle is simple : you choose a Midi controller, it doesn't matter which one, and you affect a function of Cubase to it. I didn't check a list but it seems to me that you would be able to drive almost everything via the Generic Remote ! I will consider some basic examples and then will let you facing your own imagination, I wish to you that it is overflowing ,o)
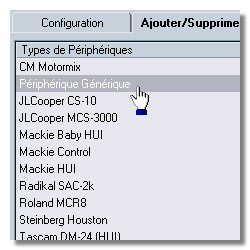
First important stage, installing our controller. Devices / Device Setup menu. Click
on the tab Add/Remove, select Generic Remote and validate by clicking on the Add button. Click then on the Setup tab. |
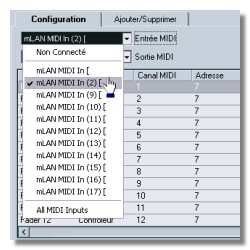
In the list at left, choose Generic Remote. You can see now on the right all the settings interface. At
the top, in the two pop-up menus, select the inputs/outputs of your Midi interface. Have a look now to the two
main windows... |
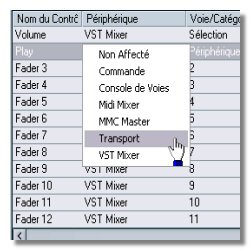
In the top one you will able to choose the Midi controller « driver ». Any Midi controller can be used. In the
bottom window, you will select the action, the function which will be activated by the choosen Midi controller.
It is not really much complicated than this ! Examples... |
 |
 |
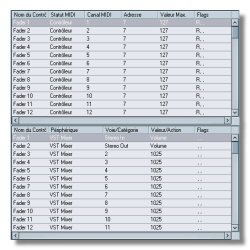 |
Double-click on Fader 1 and rename it Volume. Move the modulation wheel of your master keyboard while clicking on
the Learn button. Then, Cubase is recognizing which is the Midi data you want to use. No need to have a doctor's degree
in Midi ! |
In the bottom window, on the Volume line, select VST Mixer in the Device column, then Selected in Channel/Category and to end, Volume in Value/Action. Open your VST-mixer and look, your wheel is driving the volume of the selected
track ! |
Now rename Fader 2 in Play. Same thing, let the key at the full right of your keyboard pushed down while
clicking on the Learn button. Bottom window, for the Play function, choose dans in order the columns for Transport / Device / Start. |
 |
 |
 |
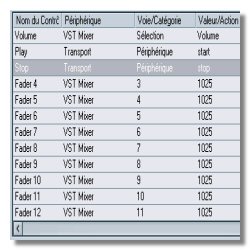
But thatiznotall ! Do again the same thing with Fader 3 which becomes Stop and to which is affected the last but one
key of the keyboard. In the functions window, choose Stop / Transport / Device / Stop. Validate all with the Ok button and come back to the Project window
|
You can from now on work without the Transport bar for starting the playback, stopping it. You could have too
envisage the record mode ! If you observe the list of the available functions, you will notice that all the
Panel is drivable
|
Another example, I find this very funny. At the top, rename Fader 1 in Forward. With the Learn button, affect to it
the wheel modulation. At the bottom, select respectively Zoom In / Command / Zoom / Zoom In. I've got the feeling that you
guessed what I want to do with my big mouse ! |
 |
 |
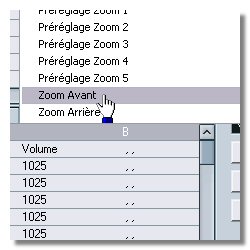 |
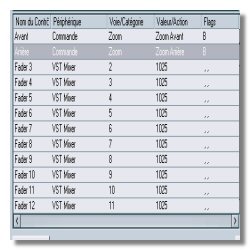
Do again the same handling but by renaming Fader 2 in Rewind and by affecting to it the Pitch Bend wheel. In the bottom,
choose in order Zoom Out / Command / Zoom / Zoom Out. Save your changings with the Ok button. Tatatan ! Let's return
to the Project window
|
And here it is, your pennies are safe, you have just built something to act on the Zoom !
Ah yes, in Cubase SX 2.2, never use in the bottom in Device the Mixer option, it seems to be useless
for a thing but crashing Cubase ! Rather select VST Mixer. |
Come on, a last one for the road ! One more time, you will use the modulation wheel, you know now how to act
in the top part of the interface. On an other hand, in the bottom you will affect the action of the wheel « Smith »
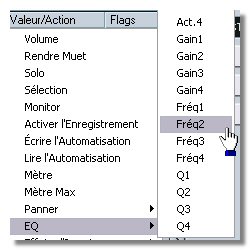
(so easy !) to VST Mixer / Sélection / EQ Fréq 2. |
 |
 |
 |
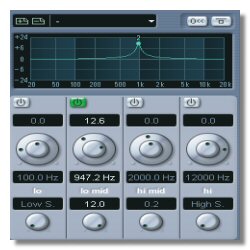
On a guitar Audio track for example, activate the Eq #2, change the Q factor to 12 and adjust the gain between 12 and 24 dB.
Launch the playback and move the modulation wheel. You are now the owner of a hand-selfmade wha-wha ! On more, the
automation can record its action ! |
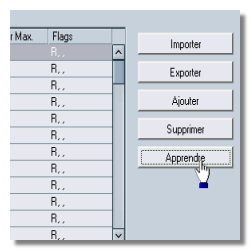
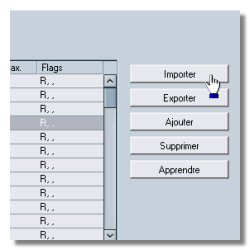
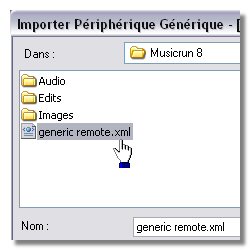
A last word on the proposed Import and Export functions. You guessed that they are useful for tranfering some settings
from a computer to another one or else to exchange some with other Cubase users. The files are in XML format
as for the « Patchnames ». |
To end majestically, for the laziest of you, you will find on the Virtual CD an example of setting
with volume control and the Start-Stop-Record from the Transport bar. Have some fun and good holydays ! See ya soon,
here or somewhere else
|
 |
 |
 |