


Groove Agent tutorial

This article was first written for the late MusicRun magazine. Its being published here with their very kind permission.
Groove Agent Special
In our so called Modern Music theres one instrument which is really ubiquitous : introducing Drums !
Whatever the kind of music youre into, acoustic or electronic, drums are the driving force behind all musical styles and tendencies. So it just seems normal that people are trying to create artificial drumtracks with synthesizers or replacing acoustic drums by drum-machines and samplers in the studio. And now of course we have access to fully equipped, DAW computers, and were slowly replacing the old magic boxes with software programs such as Groove Agent.
Make you DAW groove !
If theres indeed already a bunch of software drumsamplers like LM-4, Battery 1/2, DR-008, RM-IV, Ezdrummer, BFD and others, as far as I know, GROOVE AGENT was the first one trying to emulate the typical Drum-Machine paradigm : on the one hand, different drumkits at your disposal, and on the other hand, predefined patterns and fills in various styles and being able to put those patterns together to create a complete rhythm track/arrangement. And GA more than adequately fits this role, with the added benefit of modern, computer-based sequencers, allowing you to edit, automate etc.
The following examples have been created with Cubase SX 2, but should be adapted easily to other sequencers featuring automation functions.
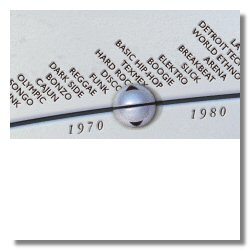
Groove Agent is extremely easy to use/manipulate - the 2 top sliders represent respectively the musical STYLE plus its associated DRUMKIT. Changing style/kit is a simple matter of moving these left/right, passing from Twist to House, with a few others in between ;-) |
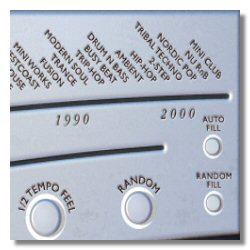
The 2 bottom sliders are assigned to the COMPLEXITY of the chosen rhythm style & to the FILLS associated to it. With 54 STYLES, every single one offering 25 VARIATIONS & 25 FILLS, youve got more than enough to play with, IMHO. |
Of course, all this doesnt stop there. On the left youve got the 2 LINK buttons, which serve the very cool purpose of UNLINKING any STYLE from its dedicated DRUMKIT. So just try a funky groove with a SOUL KIT, TRIBAL TECHNO KIT i.e. or whatever floats your boat. |
 |
 |
 |
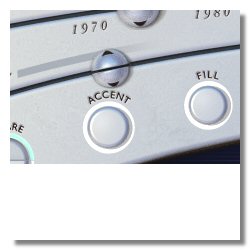
The AUTO FILL button on the right will trigger a fill automatically every 8 measures, and RANDOM FILL will choose any fill, erm... well... randomly ? However, for our little exercise we aint gonna use these little buggers, since we want to program GA to OUR taste, not its own. |
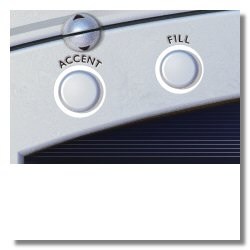
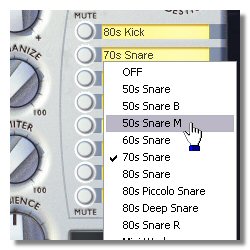
The SNARE/SIDESTICK button will be on SNARE. FILL, ½-TEMPO and RANDOM buttons will be kept on their OFF position. Of course, SNARE and ½-TEMPO could still easily be adjusted later on, should you wish to do so. The same holds true for the ACCENT button, which will play a KICK DRUM hit with a CRASH CYMBAL. |
For the 8 drumkit elements, youve got multiple choices of sounds. Between 20 and 30 different sounds are offered per element to create/customize your own drumkit. On the left the 4 buttons SHUFFLE, HUMANIZE, LIMITER & AMBIENCE should be self explaining by their names alone I think. These are applied to the whole kit, though. |
 |
 |
 |
Let's groove with the Agent !
Once done with the above basic settings, well get to the fun part, programming our creation. Deactivate both LINK buttons, choose a drumkit and if you wish, customize it. Make sure the AUTO FILL and RANDOM FILL functions are deactivated. Set the Shuffle, Humanize, Limiter and Ambience parameters. Click RUN inside Groove Agent and then press play in your host sequencer : GA syncronizes to the host's tempo. Stop the playback : GA should normally stop too. Now, it is slaved to the host, ready to obey to your orders.
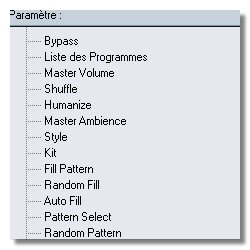
Automation is the keyword to allow us to program/edit parameter variations in a graphical way. For our little tutorial the parameters STYLE, COMPLEXITY, ACCENTS & FILLS are of special interest here. OK ? Then lets Go n Groove ;-) |
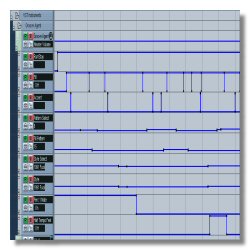
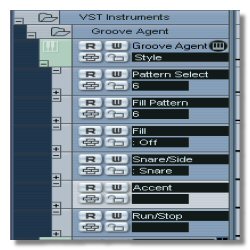
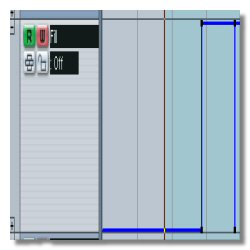
First we want to make sure that were able to see all necessary Automation Parameters. Well need STYLE, PATTERN & FILL SELECT, SNARE/SIDESTICK, ACCENT, and of course the RUN/STOP commands. Activate the Automation READ & WRITE buttons. |
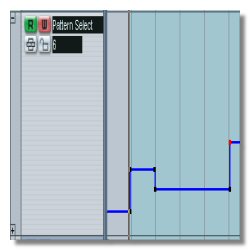
From there you just have to set the automation points where you want your changes to occur. To change your Drum Pattern i.e. just insert an automation point to the desired bar for the Pattern Select parameter and adjust it to the pattern you like. You can also change the STYLE completely if you want... |
 |
 |
 |
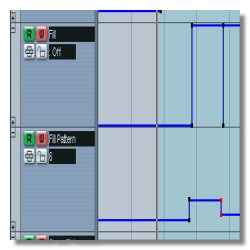
For breaks & Fills it seems much simpler to use the GA Interface and simply click on the FILL button whenever you want to insert a FILL. This is because inserting a FILL takes a few more steps to program, since it needs a point to START and another point to STOP the FILL, passing from OFF to ON and vice-versa. |
Of course we could also change the FILL PATTERN parameter directly, to set the pattern which fits in well with your music. Just as you would do with the STYLE PATTERN. With only these two parameters, STYLE PATTERN & FILL PATTERN, you can create a convincing song structure. Its up to you to choose the right combinations ;-) |
Same as for the FILLS, youd better trigger the ACCENTS on the GA GUI by left-clicking on the appropriate button with the mouse. This holds true for the ½-TEMPO FEEL and SNARE/SIDESTICK functions. All automation points can of course be edited afterwards. |
 |
 |
 |
As you can see, all Groove Agent parameters can be driven by automation, be it instrument types and their settings, DRY/WET balance for AMBIENCE, LIMITER, HUMANIZE & SHUFFLE as well as the LINK buttons and all the other "Usual" parameters. Even the MIDI OUT (Ill get to this later), Vintage Mode, Master Volume, etc. |
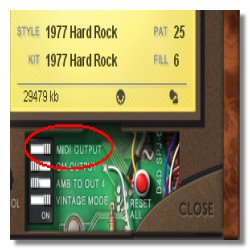
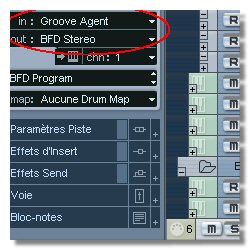
GROOVE AGENT can also be set up as a MIDI THROUGH device. On the GA GUI (bottom right) open the "Set Up" section and activate the MIDI OUTPUT function. Now create a MIDI track and choose GROOVE AGENT as MIDI IN device. You can now drive any VST-i or external MIDI gear to create your drums or even RECORD the MIDI OUT from GA. This gives a whole lot of flexibility. |
You can now edit the grooves in your favorite MIDI editor. Or re-route (in real-time of course) the MIDI out to another dedicated Drum VST-i to access better sounds.
All right, this will give you a little bit of work, sorry but you surely wont regret it ;-)
See you next time, here or anywhere else ;o) |
 |
 |
 |