


Some Fat Guitar Sound !

You have just recorded on the audio track #1 THE guitar riff of the century from your last composition that sounds like hell, and you're really proud of it, gee ! :O) But yuk! Your guitar sounds tiny, tiny, Sir, even though you have lighted a candle for Mr Van Halen...
Normal, U don't have a professional recording studio's gear, or U didn't do the best take in the world. And after all, U aren't Van Halen. ;Op
Nevermind, since VST 3.7 on PC, Cubase allows you to correct your take in a few clicks. Follow the guide, it's not very complicated ...
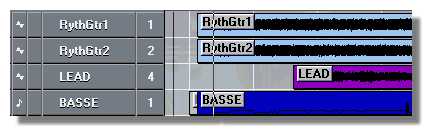
First, make a copy of the part you've just recorded and paste it on another mono audio track (#2 for example, hey !). You don't want to get lost, so a little bit of housework doesn't hurt, eh ? Let's call audio track #1 "RythGtr1" and audio track #2 "RythGtr2". Unconventional, isn't it ?
Are you ready ? Next step : check out your VST-monitor. All will be done there.
Let's go ! Set panning of track #1 completely to the left, the one of track #2 completely to the right. Get your girlfriend (who's been noisily playing with Woofy the dog for a short while now) out of the room, you'll need to concentrate at this time. Throw her the ball, for example ... ;Op
VERY IMPORTANT !!! Before carrying on, get the volume faders of the relevant tracks all the way down, so you will avoid the surprise of finding your loud-speakers embedded into the wall behind you ... U've been warned !
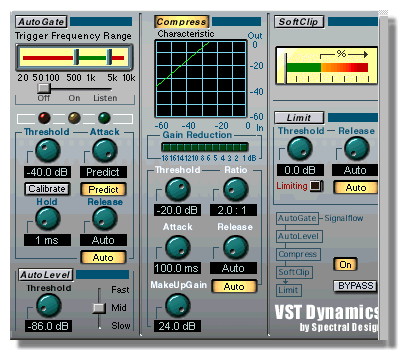
Click on the little button [FX] of track #1 in order to open the compressor implemented in VST 3.7. Sorry for those who still work on VST 3.5x or 3.6x. It could be possible to use in this case a plug-in to compensate for the absence of the "VST Dynamics" section in these previous versions. Let me remind however that the updates to VST 3.7x are available from Steinberg's FRP site (free download) ...
So, Rock'n'Roll, man, let's do it all : roll up your sleeves, turn on the compressor, set attack and gain to their maximum values. Now do you understand why I've suggested you to get the volumes down, before ? ;Op
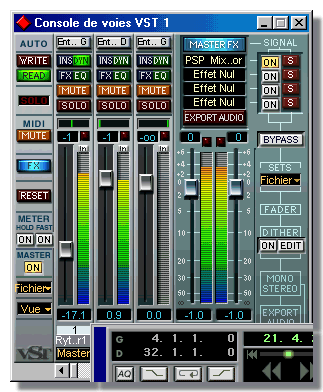
Now you only have to move up the volume faders of the tracks, up to where the meters reach again their previous level, for the balance of the sound. Yes, Siiiir, it's normal that you must move up the fader of the track without compressor higher than the one with compressor, Siiiir ! Yes, Sir ! ;O)
It sounds better, doesn't it ? A rhythm guitar in "stereo". On one side, you have the original sound with its "shades", on the other side a dynamic and punchy sound that stresses out the attack of the right hand (try with a crunchy sound and a single-coil pickup, it's in-cre-di-ble !!). Linked together, both tracks give you a sound that could make Mr Van Halen himself turn pale. ;O) You could also try different compression ratios. You could try a little bit of equalisation, if you want to, for your final mix. And now you're all set.
If you want to free some processor time, to have less tracks to manage, or just have a better vision when working with the VST-monitor, you can do a mixdown of the two mono tracks to a single stereo track, and import this one to the Arrange Window after erasing the previous mono tracks. However, I suggest you keep the original record somewhere on your hard drive, it could be useful if you want to do some other adjustments later on....
This method could be applied with other instruments, if and when it really gives some interesting results (honestly, I don't think it would be very useful on a piano sound, but, well ...)
After that, you may tell your friends that you have recorded your guitar plugged into a wall of Marshall amps ! ;O)))))